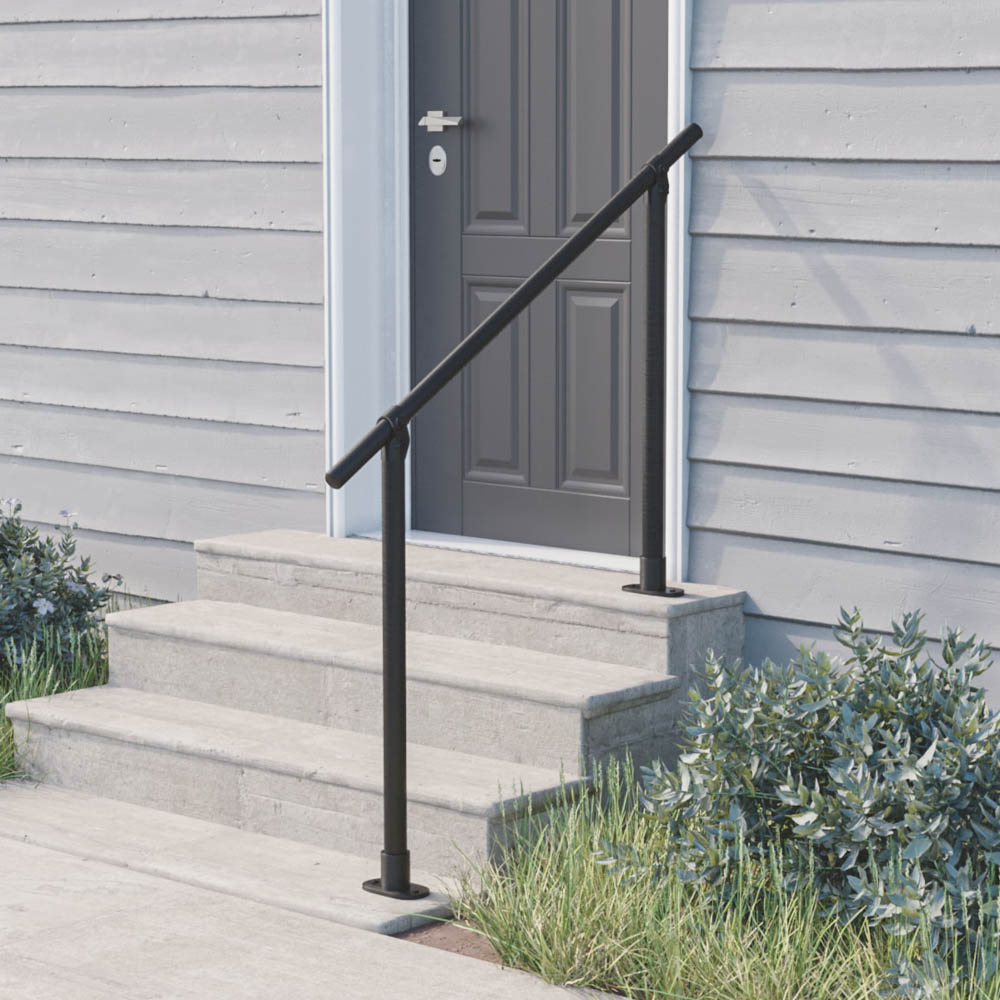
Build a Simple Rail Handrail - Surface L160A (Aluminum)
The Surface L160A is one of the more difficult kits to install, so if you can handle this project, you can probably handle installing any of our handrail kits. Keep in mind that the Surface L160A is our aluminum handrail kit, however this kit does come in galvanized steel as the Offset Outdoor Stair Rail.
Watch the Video
If you want to read the instructions, scroll down, otherwise check out this 5 minute video which will walk you through the required steps for building the Classic Offset Simple Rail handrail kit.
Step By Step Installation Process
Measuring & Ordering
Before you begin begin you will need the required parts and tools. For parts you will need the following:
L160A Simple Rail Kit - the decision you need to make is how long the grab rail will be. You can usually determine this by holding a tape measure along the angle the stairs on which you are placing the handrail. As you can see from the pictures we also decided to powder coat most of the pipe and fittings for this project glossy black. (Our standard Railing Kits come in a galvanized silver finish.)
Anchors for the Base Flanges - you will need two anchors for each base flange. The anchors you need are dependant upon the material you are mounting the handrail to. For this project we used concrete wedge anchors.
Self-drilling Screws to Attach the Pipe to the Brackets - these are available at the homestore. You will need 2 #12 self-drilling screws for each bracket.
As far as tools are concerned, here is a list of the tools we used on this project
- Hammer Drill (for drilling into concrete)
- Standard Drill (for drilling into pipe)
- Allen Wrench (to tighten fittings)
- Socket Set (to tighten BoxBolt)
- Hammer
- Tape Measure
- Hack Saw
- Crescent Wrench
- Vacuum
- Extension Cord
- Sharpie Marker
Start with a Rough Fit
When you have all the parts, do a rough fit by holding the railing and uprights in place. This will ensure that you have the correct size materials. Place the uprights in their general locations and hold the handrail across the top of the uprights. Ensure that everything looks right before you begin cutting, drilling, etc.
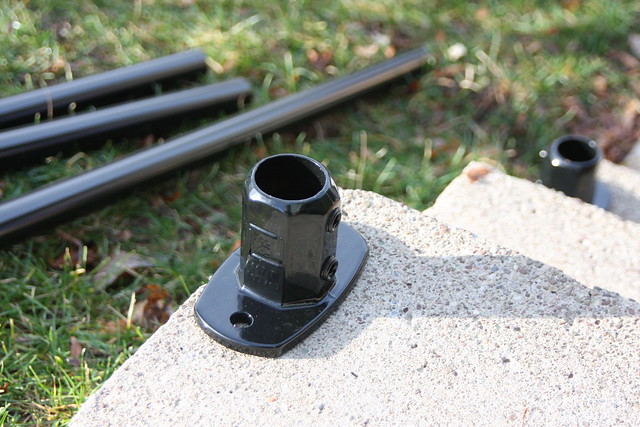
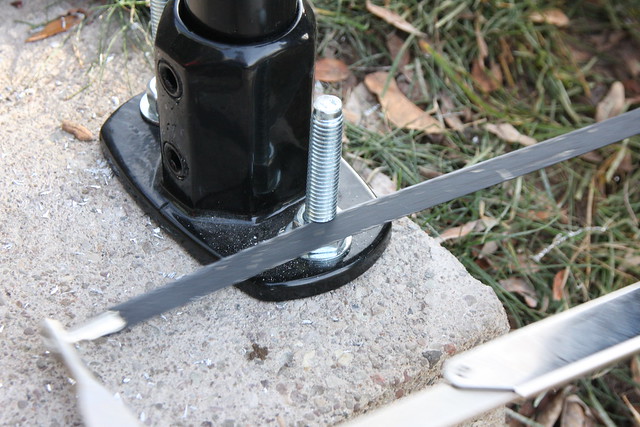
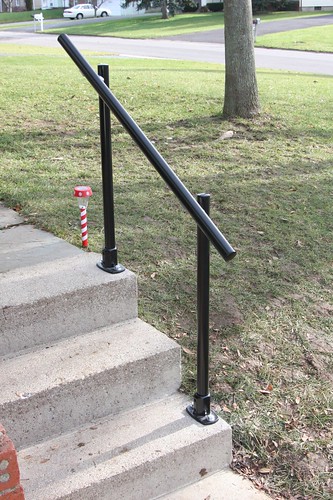
Attach the Bases
Start by placing a mark in the hole of each base where you have placed them.
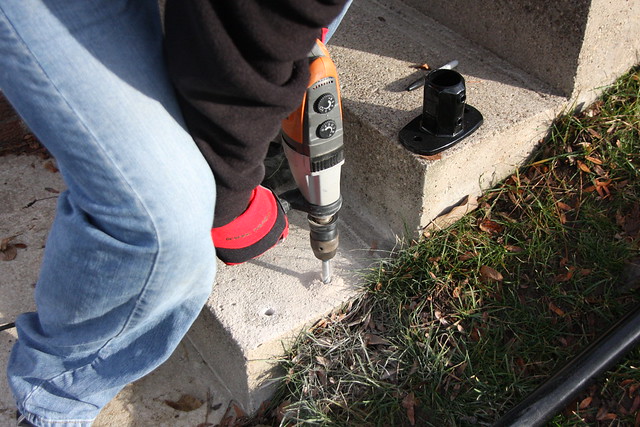
Using a hammer drill, drill the hole in the concrete for the the wedge anchor.
Place the base flanges over the holes to ensure that everything is lined up.
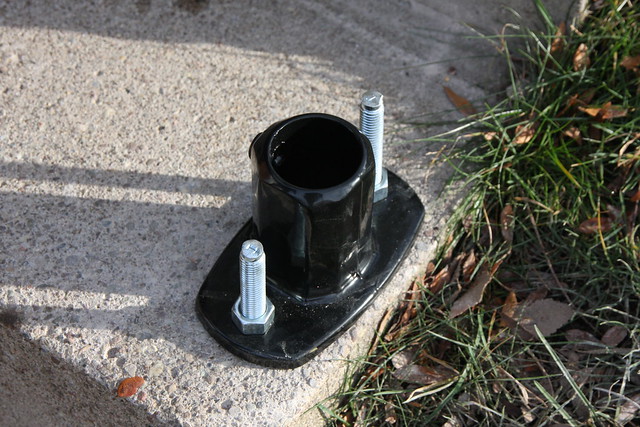
Hammer in the wedge anchors and place the base flange onto anchors.
Put the washer and nut for the wedge anchor onto the wedge bolt and hand tighten the bolts.
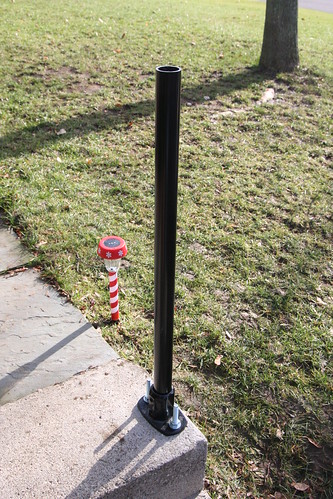
Insert the Uprights
Insert the uprights into the base flanges and tighten the set screw on the side of the base flange.
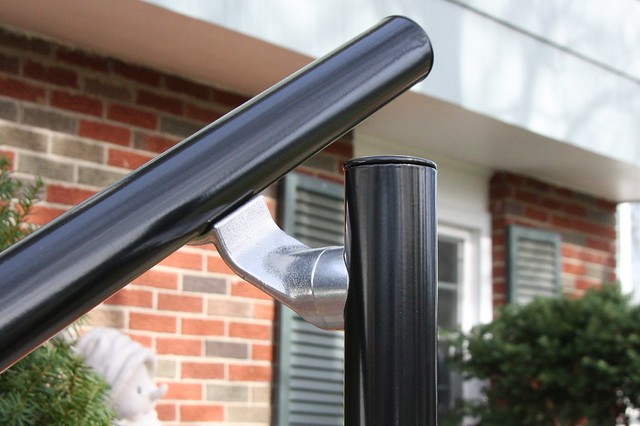
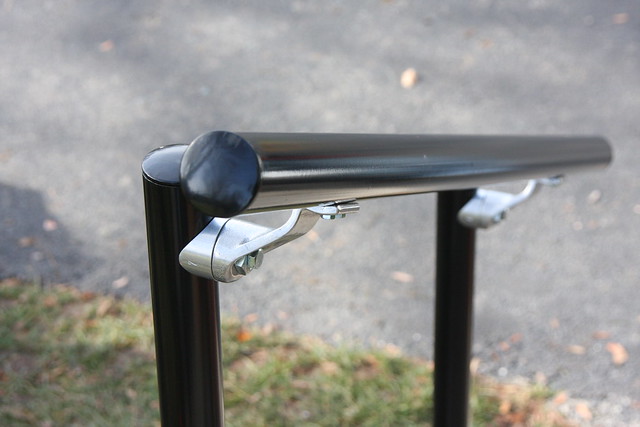
Attach the Handrail Brackets
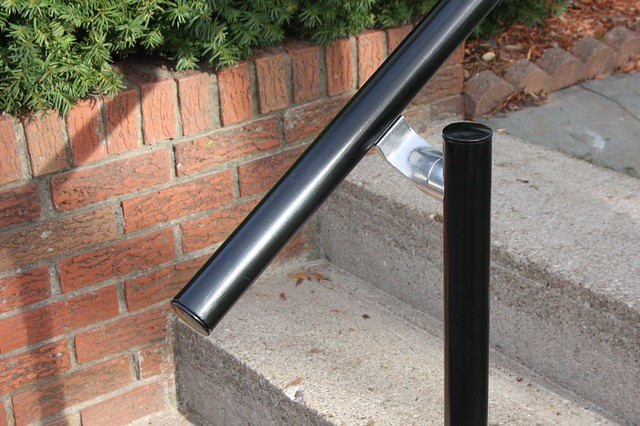
Attaching the handrail bracket for the L160A involves several steps. (Other Simple Rail handrail kits are much easier, but the side mounted nature of this kit requires extra drilling)
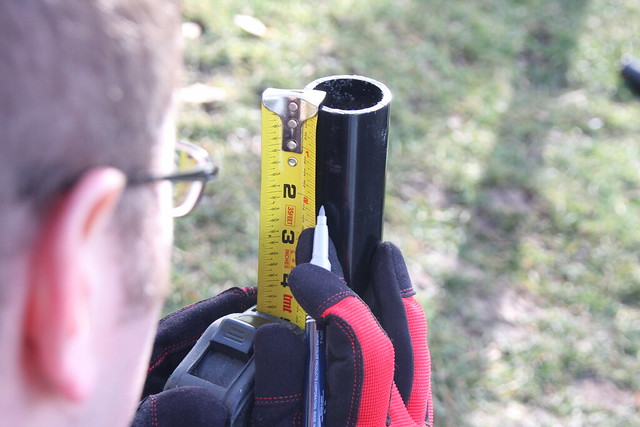
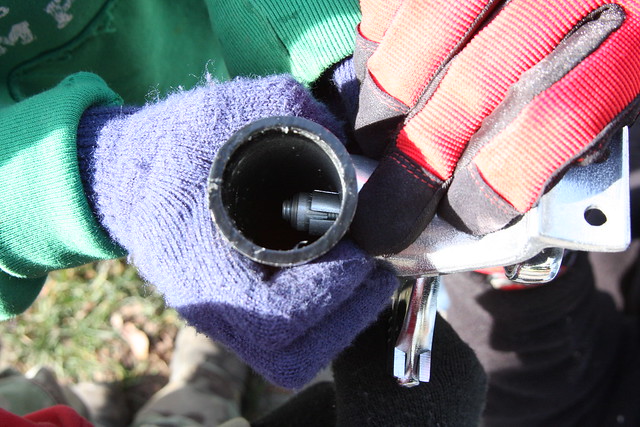
Begin by measuring down the side of the outer pipe about 2 inches. Put a mark for the center of the hole for the bracket attachment.
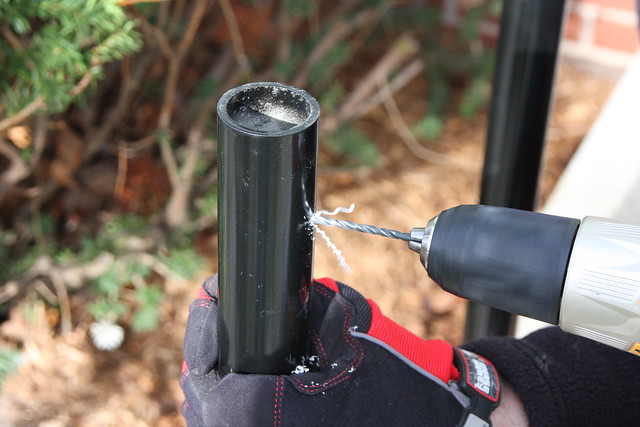
Drill a pilot hole, and then enlarge that hole to the appropriate size for the BoxBolt
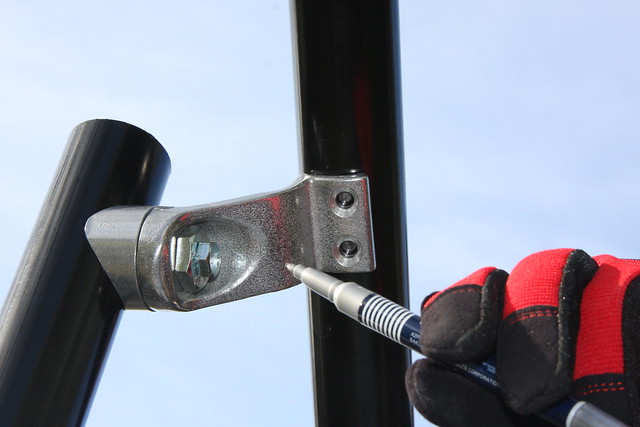
It helps to have a helping hand at this point in the process. Holding the bracket over the hole, insert the BoxBolt through the bracket and into the hole. Using a wrench, hold the sleeve of the BoxBolt while tightening the bolt in the center. The inside will expand, holding the bracket tight against the pipe. You don't need to make it super tight, leave the bracket slightly loose so you can set the angle with the handrail pipe.
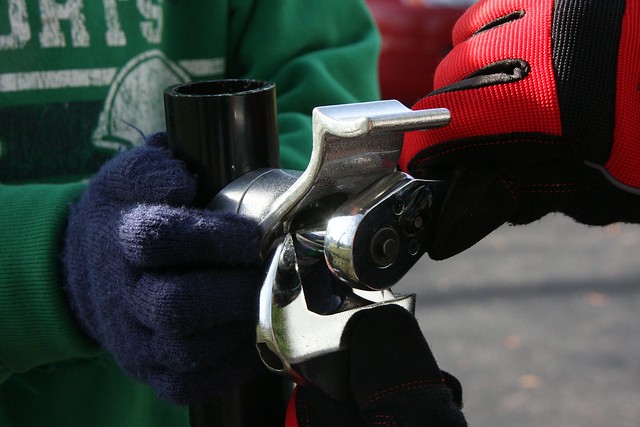
The BoxBolt is an expansion anchor that sits inside of an expanding sleeve. The principal is that you only need access to one side of the bolt to tighten it down.
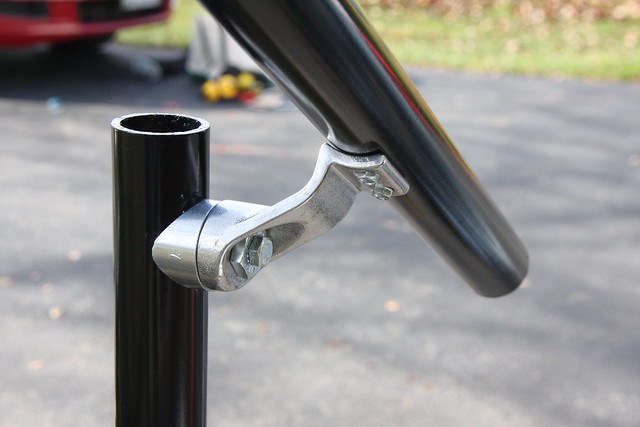
Attach the Handrail
You begin to attach the handrail by setting the handrail pipe on the brackets. This is a good time to adjust the angle of the brackets so that the cupped part of the bracket receives the handrail pipe.
Mark the holes where you are going to attach the handrail to the bracket and pre-drill the holes in the pipe. Technically you don't have to pre-drill holes for self drilling screws, but we find it makes installation much easier!
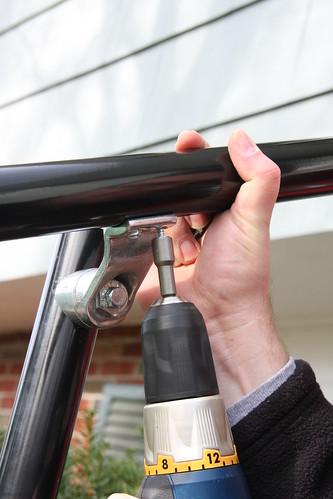
Using the self-drilling screws screw the handrail to the brackets. When you finished with this step ensure that the brackets are tightened down completely to the upright pipe.
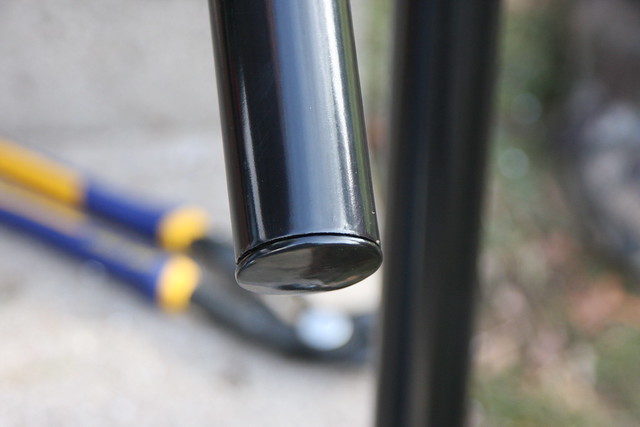
Pound in the Pipe Caps
The finishing touch on this railing is to add pipe caps to the uprights and handrail. Insert the caps into the pipes, cover it with a piece of cardboard and pound the cap into place.
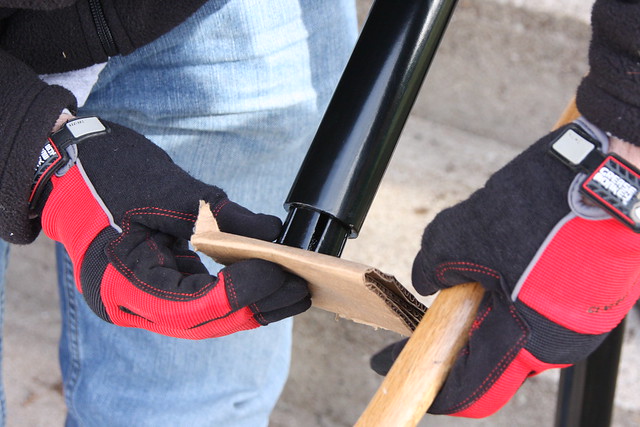
The cap should be flush with the pipe when you are finished pounding it into the pipe.
Finish the Bases
Finish the bases by tightening down the bolts and hacking off the top of the wedge anchors.
Your Done!
Bask in the glory of your completed handrail.

Learn more about Simple Rail handrail kits.
Simple Rail™ Handrail Kits
Like this project? Now building a simple handrail is even easier! Constructed with Kee Klamp fittings, Simple Rail handrails are durable and easy to install. Simple Rail™ kits are great for home owners, business owners and landlords.
Browse Simple Rail Kits